 |
|
|
|
|
Getting Started
If you're using Webgenz CMS for the very first time, you're likely to have a few questions about how to get started.
Here's a detailed list of steps to help simplify the process.
- First, you'll need to configure Webgenz CMS so that it knows about your favorite text editor and web browser.
Webgenz CMS allows you to designate a text editor which is used whenever you edit a
template file or macro file
through Webgenz CMS. You can also designate a web browser that is used to preview the web pages you create
in Webgenz CMS. To configure your text editor and web browser in Webgenz CMS select "Tools -> Options..." from
the main Webgenz CMS menu bar. Then select the "Applications" tab. After doing so, you'll see a screen that looks
similar to the one below.
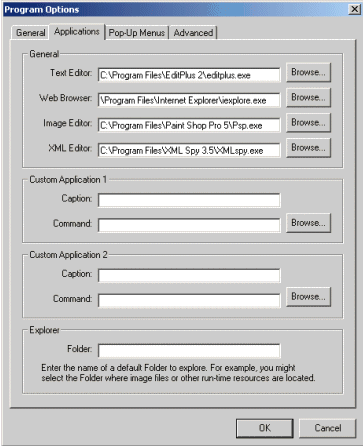
The two most important options to configure at this time are the "Editor" and "Browser" options. Click the "Browse..."
buttons next to these options and select your favorite editor and web browser. After doing this, press "OK". (Note: if
you're ambitious, you can also configure your favorite image editor, XML editor, as well as custom applications. Once you configure
these programs, you will notice that there are icons on the Webgenz CMS tool bar that allows you to launch these programs).
- Now you're ready to move on. The next
step is to define a new Project in Webgenz CMS. To define a new Project, simply select the "File -> New Project..." menu
choice from the main Webgenz CMS menu bar. After doing so, you will see a screen that looks like the one below.
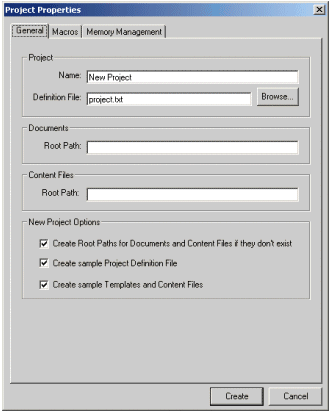
Select a name for your Project and enter it in the "Name" field. Next, select the name of a
file that you would like to use as the Webgenz CMS
Project Definition File. Enter this file name in
the "Definition File" field. If this is your first time creating a Webgenz CMS
project, you can simply keep the default values that appear in these fields.
Your next step is to set the "Root Paths" for the document
files (i.e. the output files that Webgenz CMS creates) and the content files used by your Project. Set
these paths to the name of a Windows Folder where you would like to keep all of the files
related to your Webgenz CMS project.
Notice that there is an area of the screen labeled "New Project Options". By default the checkboxes
in this area are checked. Keep these checkboxes as they are and a sample Webgenz CMS project will be created
when you press the "Create" button.
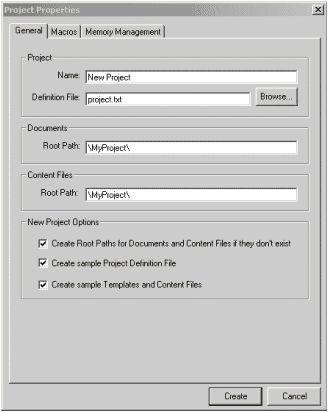
Press the "Create" button. You will be asked for a file name. Again, just keep the default value and click "Save".
You will return to the main Webgenz CMS
screen and it will look similar to the following:
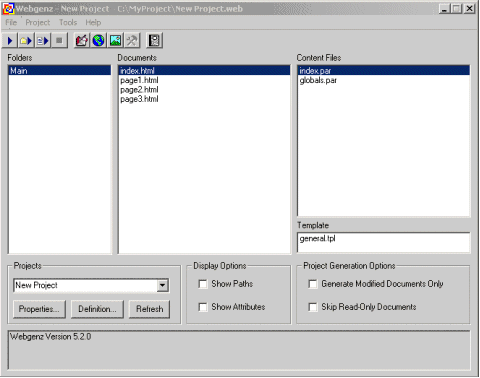
- Congratulations. You've setup a basic Webgenz CMS Project. If you double-click on a content file or a template file, these
files will open in your text editor. To preview the generated project in a web browser, simply "generate" the project
by pressing the first button on the Webgenz CMS toolbar (the button that looks like a VCR "play" button). After doing
this, just double-click on an HTML document in the center listbox and you will be able to preview the document
in the web browser that you configured in Step 1.
- What's next? Now that you have a basic project setup in Webgenz CMS, you continue to iterate on the development of
the project. Typically, this means that you will enhance your template with design and layout elements, add more
content, and continue to add documents to the Project Definition File. Remember, you can define and create your own
macros, you can nest macros, and more. Have fun!
|
|